


 We’ve all heard that video is the best thing going right now in social media and that Facebook love videos. But you may not be ready to jump in front of the camera or learn a new video program. Ain’t nobody got time for that!

That’s where Facebook Slideshow comes in….it’s the answer you’ve been looking for! It’s great for a quick easy video to show off your product. And not to mention you can boost the post as well!
So let me show you how easy it is to create a slideshow:
How to Create Your Facebook SlideShow:
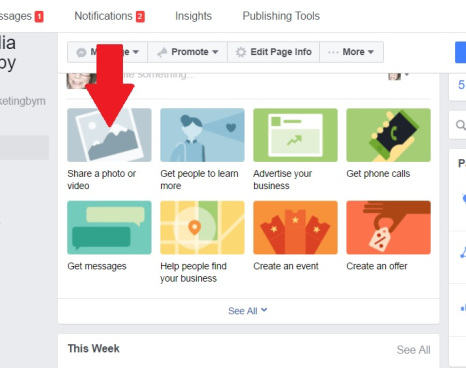
Step 1: First you’ll want to go to your Facebook Business Page . Once there, just below the status box, you’ll see ” Share A Photo or Video. From here Facebook will walk you through
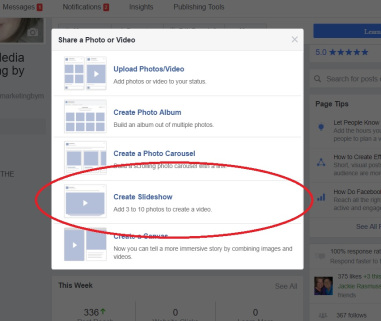
Step 2: Select Create Slideshow, it’s the 4th option down. You can add up to 10 photos to create the video.
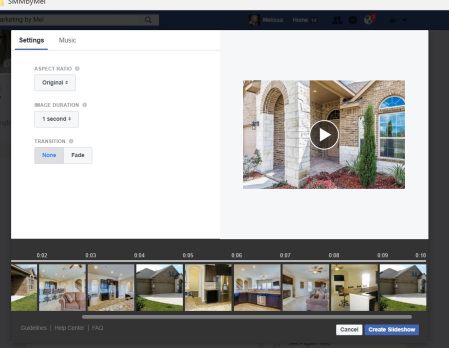
Step 3: Next you need to choose your Video components.
- Aspect ratio (the size of your final video) – you can choose from original, square (1:1), rectangle (16:9) or vertical (2:3). Click to try each one to see how it looks best.
- Duration of each slide – you can choose from 0.5, 1, 2, 3, 4 or 5 seconds for each slide on your Facebook Slideshow. I typically use 1 or 2 for the duration.
- Transition – you can choose from having no transition or to fade your transition. Fade is my favorite.
At the top next to Settings, you can choose the Music. I typically don’t choose music with my videos but it may apply in your video. Have fun and be creative with it.
Step 4: Click on the “+” sign to start adding your photos. You can choose from the photos from your Facebook page, Upload a Photo from your computer or Take a Photo.
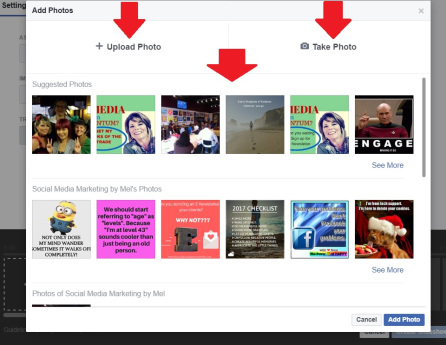
Step 5: You’ll want to upload the photos in the order you want them to appear in the video. However, you do have the capability to click and drag them around to reorder them. You can also add more if you didn’t have 10 initially or delete some if you want less or to change one out. To delete a photo, hover over the photo you want to delete and an “x” will appear in the top right corner. Click it to delete.
Once you have all your images uploaded, you can preview the video to see what your Slideshow will look like. Just press the arrow in the middle of the video as show above.
When you are ready, you can click Create Slideshow to create it.
It will take a few seconds for your video to be ready (depending on how many images you have and the duration). There will be a pop-up message when it is ready.
You can click on it and view it and add a description to your video.
You will also be prompted to add a title if you want to. This is highly recommended as your video will list in your “Video Section” on your Facebook Page, so people can find it easily.
I have used Facebook Slideshow with a lot of my clients.
How I’ve Used Facebook Slideshow With My Clients
Here’s a few ways:
Realtors: I’ve uploaded their listing photos to showcase a new listing.
Nutrition Company: I’ve created a slideshow of their products
Floor Cleaning Company: I’ve created a slideshow of their before & after cleanings.
Hairstylists: Before & after photos of their clients
This is great for all kinds of businesses!
Have you used Facebook SlideShow with your business? How have you used it?